Index
- Creating an Account Chart
- Creating an Account
- General Settings
- Understanding Permissions
- Posting Journal Record
- Managing Accounts
- Customers’ Records
- B2B: Records in Customer Account Section on Frontend
- MageCore Dashboard Integration
- Mobile Ready
This section provides an overview of creating the Chart of Accounts that stands for a table of contents for your finances. You can manage the accounts of several stores with multiple account charts inside one solid module – Integrated Accounting.
To create a new Account Chart, follow the steps below (Please note: you need to be a user with permission to change this settings):
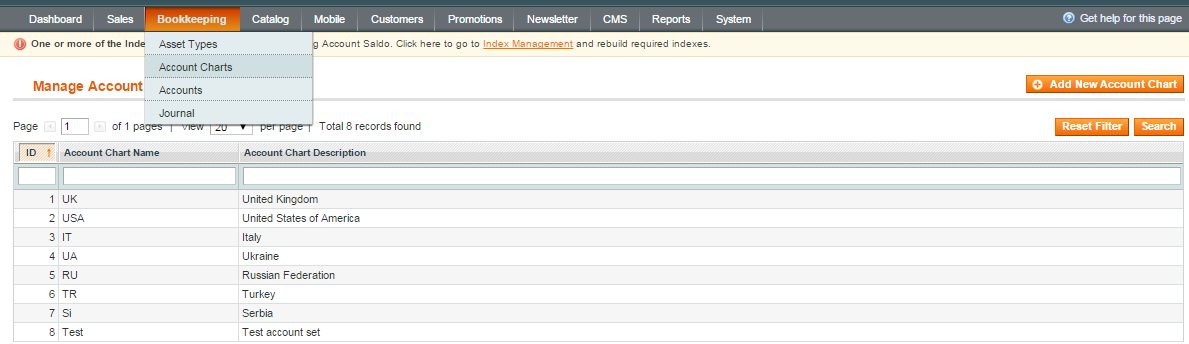
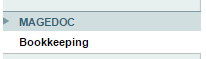
1) select Bookkeeping->Account Charts->Add New Account Chart:
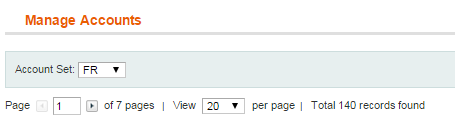
2) fill in required fields (for instance, we will create the account chart for France):

3) to make the process of adding accounts easier and faster, you can use the .csv file which must contain the following required columns:
- account_id;
- parent_id;
- code – unique;
- name;
The optional fields are:
- type (default is “debit”);
- hierarchy_type (default is “primary”);
- description.
This is an example of how your .csv file should look:
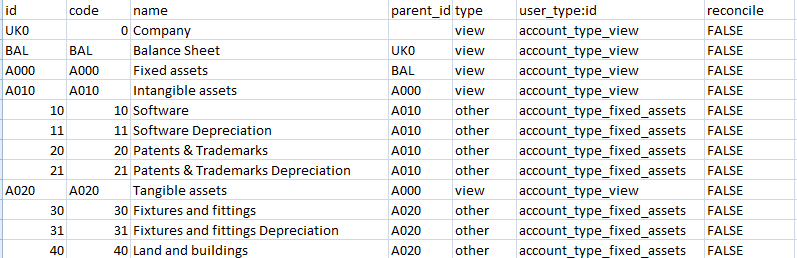
You can use any order of the columns.
Also you can use any list of available account charts from Odoo (ex-OpenErp) github repository –
For UK please use:
4) select a file and save the Account Chart:

5) If you uploaded the accounts from the file, you can see them in Accounts (select Bookkeeping->Accounts). Select the Account Set that you want to use:
Bookkeeping is not just about keeping all documents together, it also allows you to organize accounts into specific categories and structure. The hierarchy type of each account can help you with that.
To create a new Account please follow the next steps:
1) select Bookkeeping->Accounts->Add New Account
2) fill in the required fields in Account Information tab. Here you can select:
– the type of account (it is used for a balance calculating);
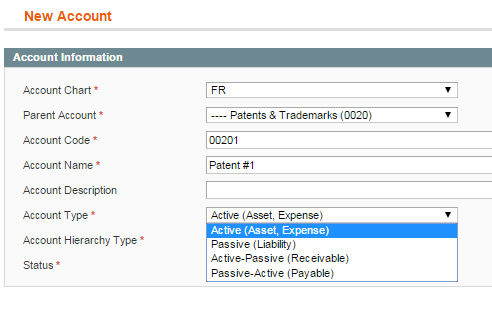
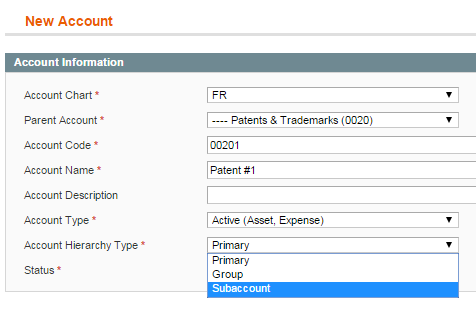
– the account hierarchy type.
You can read about the hierarchy type of account at the end of this section.
3) the account’s status (select ‘disabled’ if you want to hide the account).
Also you can use the ‘Group By’ option which shows the records with non-zero saldo grouped by Customer or Reference:

4) after saving your account, you can see it by clicking Bookkeeping->Accounts

There are 3 account hierarchy types used for defining user’s permissions for the account:
1) primary – if you allow a user to access a primary account, they can access all the subaccounts (you do not have to create a permission for each subaccount);
2) group – you can assign the high-level account for a group of subaccounts. But you have to select each subaccount you want to allow your user to access manually using the user’s Personal Accounts option;
3) subaccount – the accounts may be grouped. So this option allows to determine a lower level for the ‘group’ or ‘primary’ account (for instance, Money account has ‘group’ type and Credit Card, PayPal have ‘subaccount’ type. Money is a Parent Account. If you select Money as a permission for a particular user, then please select all the sub-accounts like Credit Card manually to allow this user to operate them).
For each subaccount please select the Parent Account.
Integrated Accounting is based on a double-entry bookkeeping system. Please follow the next steps to customize some of its general settings:
1) System->Configuration, then select a Bookkeeping tab:
2) your Default Posting User is used for automated posting. Also, it defines a superuser who has more permissions than others:
![]()
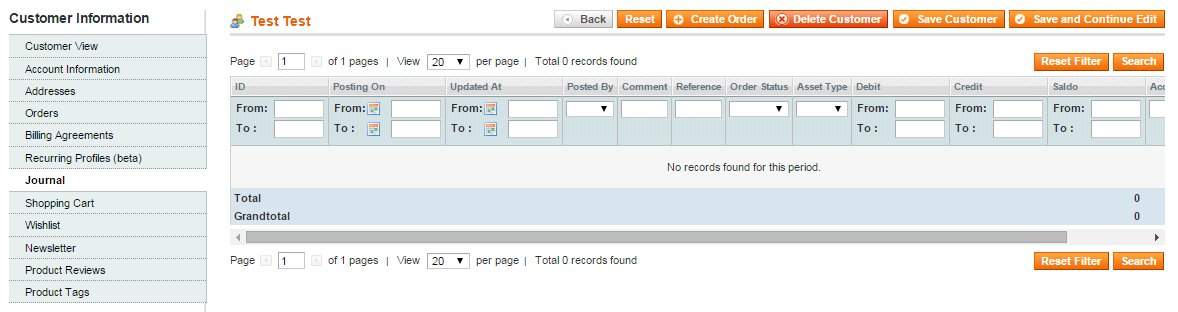
3) you can see all the journal records connected with a customer (Customers->Manage Customers, then select a customer) in the Journal tab:
If you want to display the customers who have only saldo value more than Min Saldo Deviation, you can use this option (System->Configuration->Bookkeeping):
![]()
4) you can choose an option for a possibility to reverse records (System->Configuration->Bookkeeping). After this time has passed (60 min on a screenshot) the records can’t be reversed.
A superuser can reverse all the records during the time set in the Allowed Reverse Interval for All Records:


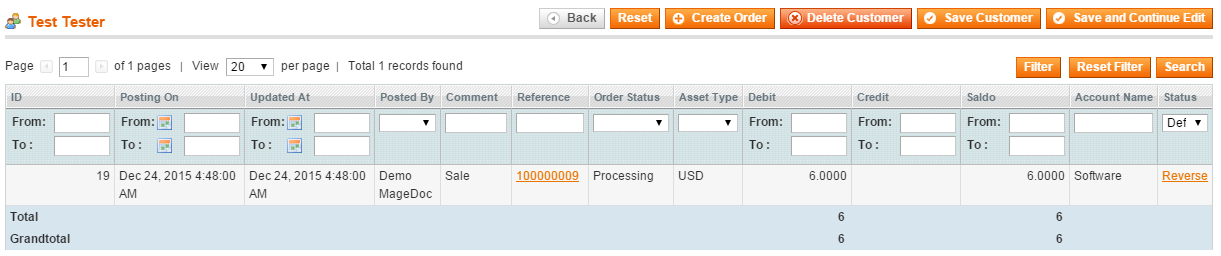
5) the Customer Records Account option (System->Configuration->Bookkeeping) helps to tie the client’s name to the journal record automatically in Customers->Manage Customers->select a Customer->Journal tab:
6) the Income Parent Account (System->Configuration->Bookkeeping) allows you to close journal records automatically if you do not have an integration with a payment system:

7) the Automated Posting Rules (System->Configuration->Bookkeeping) allow you to specify the task conditions using our specific scripting language.
This option saves a lot of time because you can automate the process of adding the amount of customers purchases in your Magento. Select the event which will activate the automated posting and the accounts which will participate in the process of posting a journal record. The customer and amount of the transaction will be added automatically.
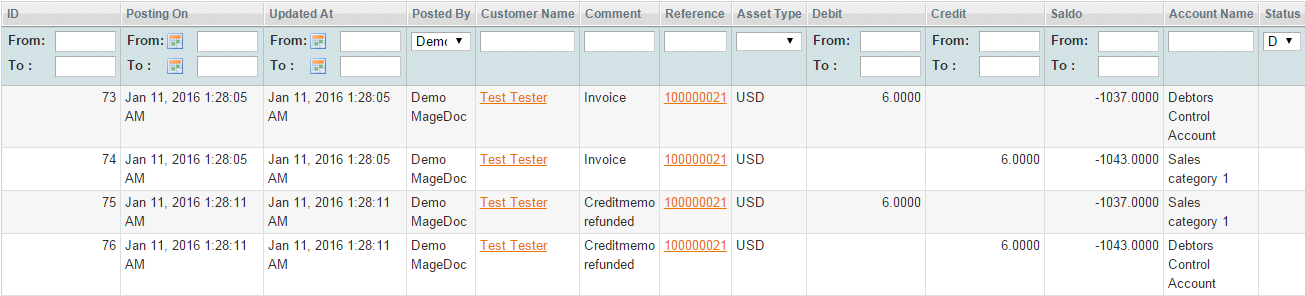
Here you can create rules for invoices, pending, canceled orders etc.:

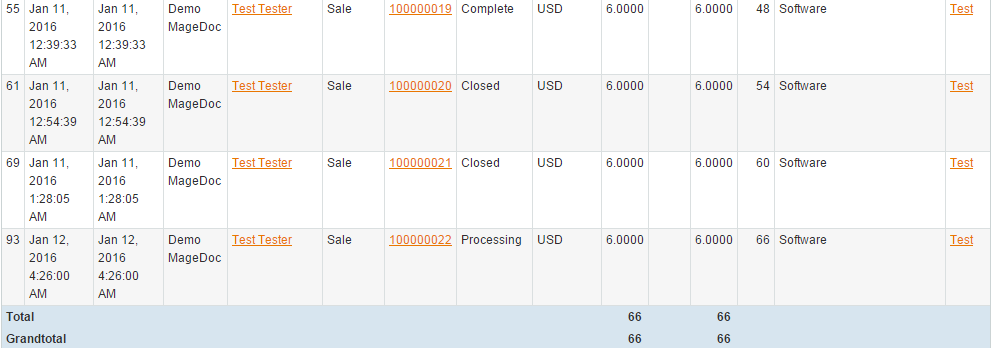
The customer’s name will appear in the Journal record:
8) Reconciliation Posting Action Templates function helps to provide the accounting transaction in one click. You can post the amount of money through two Accounts automatically. The saldo limit will help to write off the sum:

9) Customer Records Reference RegExp for Linking is used for checking if the reference number is correct:
![]()
10) Enable Invoice Capture on Income Payments turns on/off all the auto transactions:
![]()
Automated Posting Rules support several Magento events to create journal records automatically.
Below, you will find some events and automated posting rule samples.
Notice: the Test Condition field allows you to prevent the posting of journal records if the condition is not fulfilled. You can leave Test Condition field blank.
Select the Asset Type you want to use.
| Event | Account | Corresponding Account | Comment | Customer Id | Reference Id | Reference | Amount |
|---|---|---|---|---|---|---|---|
| 1. sales_order_invoice_register | 1100 – Debtors Control Account | 4000 – Sales Category 1 | Invoicing | {{getOrder()/@customer_id}} | {{@order_id}} | {{getOrder()/@increment_id}} | {{@base_grand_total}} |
| 2. sales_order_invoice_pay | 1100 – Debtors Control Account | 1200 – Bank Accounts | Taking payment | {{getOrder()/@customer_id}} | {{@order_id}} | {{getOrder()/@increment_id}} | {{@base_grand_total}} |
| 3. sales_order_invoice_cancel | 4000 – Sales Category 1 | 1100 – Debtors Control Account | Crediting | {{getOrder()/@customer_id}} | {{@order_id}} | {{getOrder()/@increment_id}} | {{@base_grand_total}} |
| 4. a) sales_order_creditmemo_refund | 4000 – Sales Category 1 | 1100 – Debtors Control Account | Crediting | {{getOrder()/@customer_id}} | {{@order_id}} | {{getOrder()/@increment_id}} | {{@base_grand_total}} |
| 4. b) sales_order_creditmemo_refund | 1100 – Debtors Control Account | 1200 – Bank Accounts | Refunding | {{getOrder()/@customer_id}} | {{@order_id}} | {{getOrder()/@increment_id}} | {{@base_grand_total}} |
| 5. bookkeeping_order_shipment_register | 5000 – Cost Of Sales | 1001 – Stock | Order shipped | {{@customer_id}} | {{@order_id}} | {{@increment_id}} | {{@base_grand_total}} |
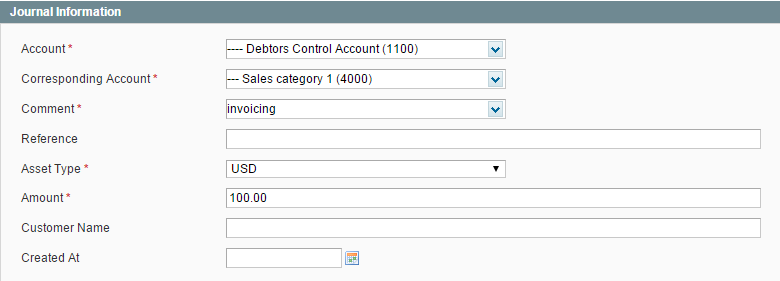
- When an order is invoiced, the sales_order_invoice_register event is dispatched:

The Debtors Control Account (1100) contains the total of the invoice that a customer has to pay. This account is matched with Sales Category 1 (4000) account by a customer and order id:

- When an invoice is repaid by a customer, the sales_order_invoice_pay event is dispatched. The following rule can apply if you receive customers’ payments only with your Bank Account:

The amount of the transaction equals the invoice total.
- sales_order_invoice_cancel: you can create automated postings for this event if you have the invoice status ‘Pending’. For example, if such payment methods are used: Authorize.net, Paypal and Paygate.
- sales_order_creditmemo_refund:
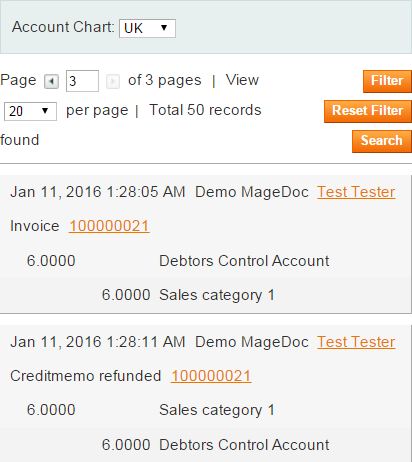
a) when a sales credit is credited, the sales_order_creditmemo_refund event is dispatched:

The entry made to the Debtors Control Account (1100) is the total of the credit memo (credit note).

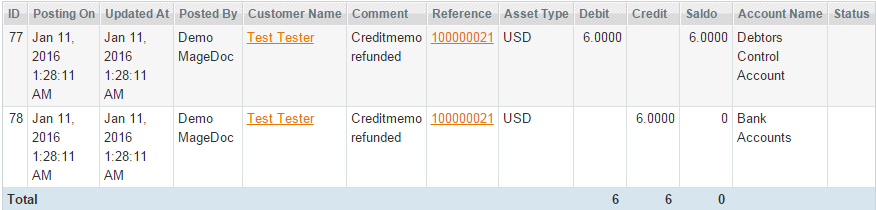
b) when a customer is refunded the sales_order_creditmemo_refund event is dispatched:

The funds are moved from Debtors Control Account (1100) to Bank Accounts (1200):
5. At the point of shipping the bookkeeping_order_shipment_register event is dispatched:

The purchases amount is moved from Purchases (or Cost Of Sales, 5000) to Stock (1001) account:

Understanding Permissions
Bookkeeping Personal Accounts
Setting User Personal Accounts:
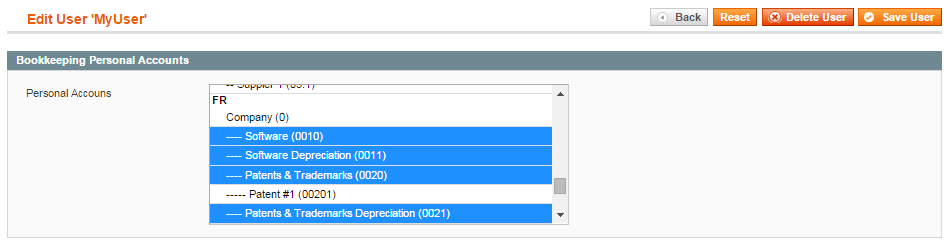
Bookkeeping Personal Accounts tab allows you to select the accounts that the customer will be able to access.
Select several accounts in System->Permissions->Users, ‘Add New User’, Bookkeeping Personal Accounts tab:
Setting Role Bookkeeping Permissions:
You can set up user roles and their access level to different areas of Integrated Accounting module.
Permissions are used for setting the accounting policy and assignment different operations for different users. If you want to determine your clerk’s access to your profit and loss statements, you can configure your user’s and role’s permissions.
The Role Bookkeeping Permissions determine the Accounts which you will use to create the Journal Records. When creating new Journal Record, you will see the available Account pairs.
The Role Bookkeeping Permissions can help you divide and set the access level to different Accounts. You can set your own User Role for any kind of permission:
Please note: the access level depends on the account type. There are 3 account types (that are determined while creating an Account):
- Primary – all the subaccounts are available;
- Group – this option groups several subaccounts under one Account, but doesn’t allow you to access the subaccounts when you select this Account as accessible;
- Subaccount – each Account that is grouped under another Account.
You can also read about the Account types and hierarchy here.
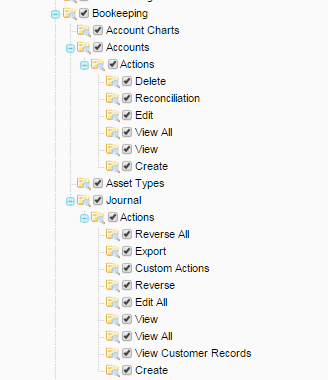
To set Role Bookkeeping Permissions please follow System->Permissions->Roles, click ‘Add New Role’ button, select the access control rules for your new role and select all the Accounts and Corresponding Accounts you need:

All accounting transactions are recorded through journal entries that show account names, amounts, and whether those accounts are recorded in debit or credit side of accounts etc.
The Journal Record:
1) select Bookkeeping->Journal and you will see a table:
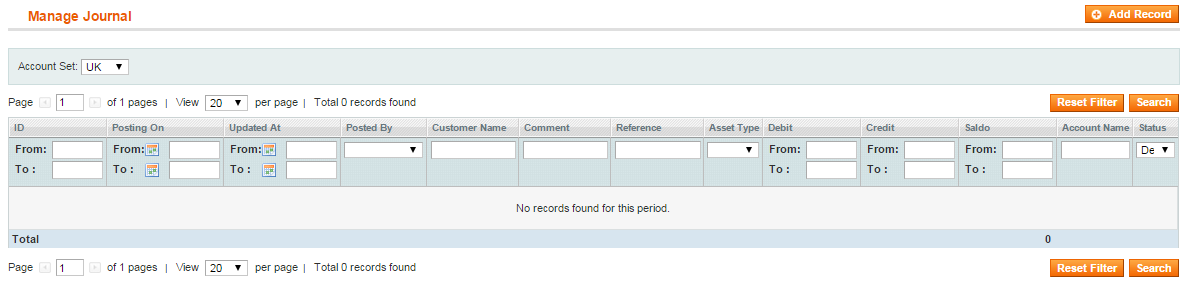
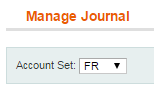
2) select Account Set:
3) click on ‘Add Record’ button. Please note: your user role needs to have a permission to Accounts that you will use (Please see the ‘How to set a user role’ instruction).
4) fill in all the required fields (you can select only the accounts for which your user’s role gives a permission):
5) click on ‘Save and Continue’ and your journal will be saved;
6) you can see all the journal records connected with an account by clicking Bookkeeping->Accounts (the Journal tab). Also all the bank operations can be tied with the bookkeeping system and viewed.
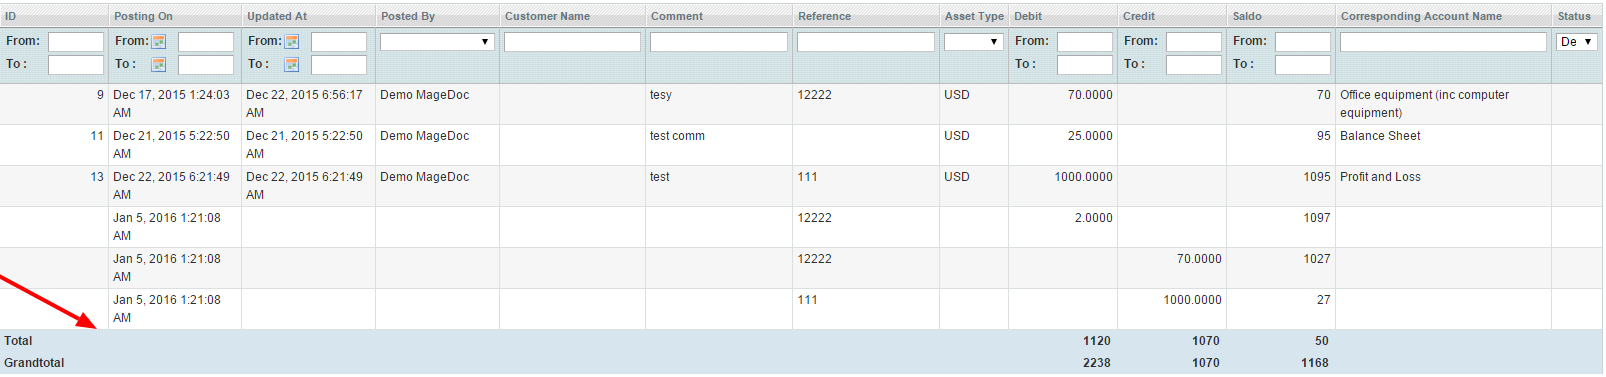
You can also select the settings which will help you to display the right records:
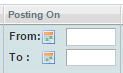
- date filter (date of records posting) helps if you do not need to display all records available:
- the amount of records per page (is useful for big numbers of records):
![]()
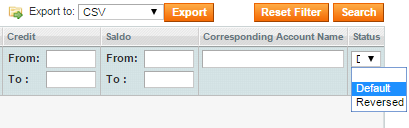
- if you want to show only records that don’t match, please select Default as Status:
Every journal posted to accounts must balance (debits = credits) in double-entry bookkeeping. Here are some examples of the most common journal records used in business:
- An invoice is received and the product stock is tracked. You can see the Bookkeeping Permissions (System->Permissions->Roles) needed to create this journal record:

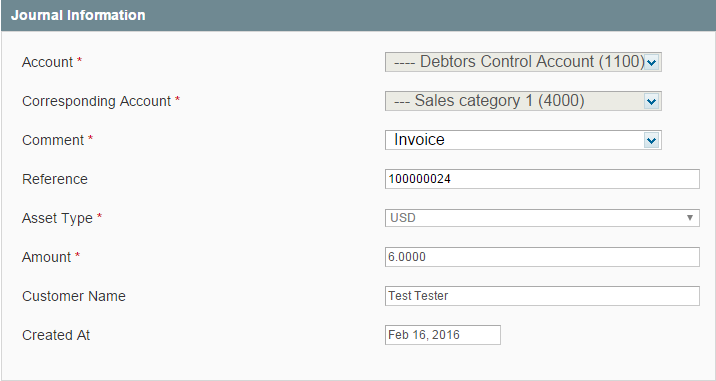
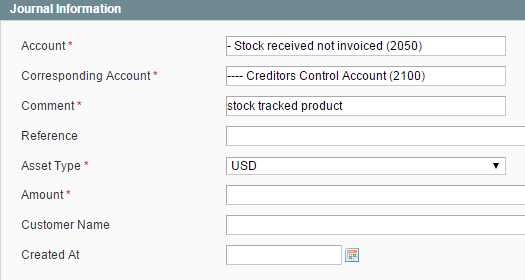
Also here is the journal record example (Bookkeeping->Journal->Add Record button):

2. A non-stock product is tracked (inventory accounting is not required), and a purchase invoice is received:
![]()
![]()
3. The stock tracked items are received but not invoiced. Stock account (1001) contains the inventory value.
![]()

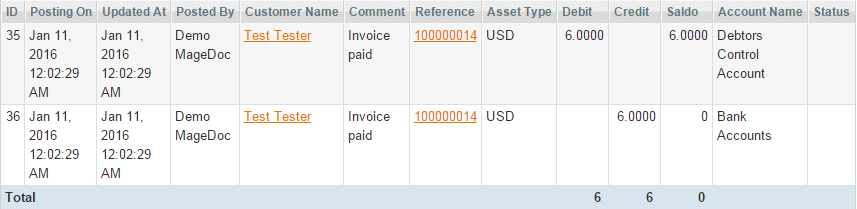
4. The order or invoice is paid:
![]()

5. When you receive the credit:
![]()

Managing Accounts
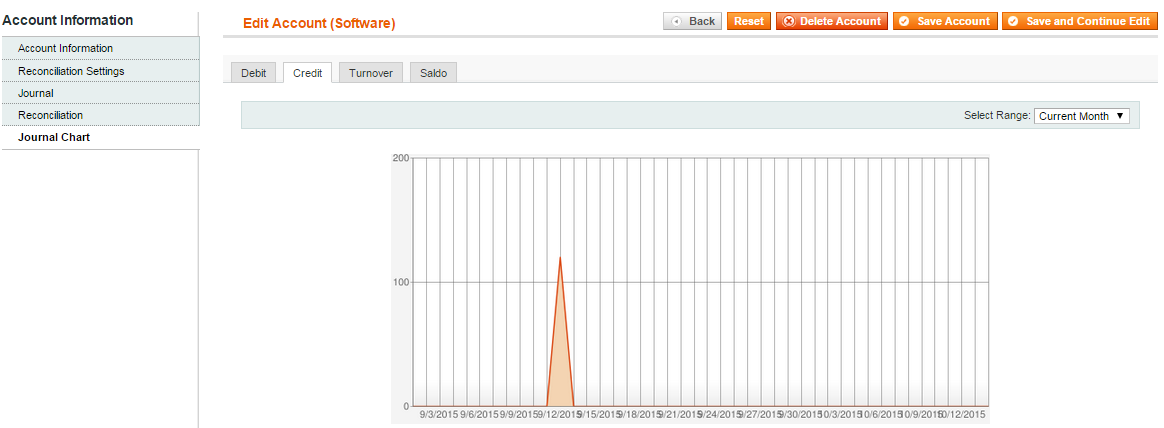
On the Journal Chart tab you can see a chart for a particular account for the specified period:
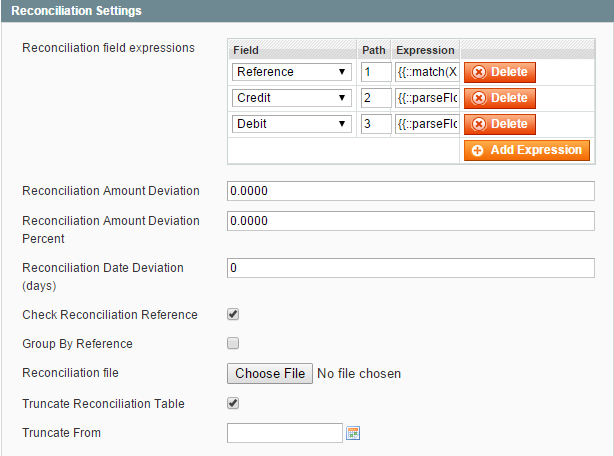
You can easily compare your account’s journal records automatically configuring the Reconciliation Settings. You need a .csv file with journal records which you will compare.
- Select the Field value from the drop-down list and set the number of a column from your compared .csv file as Path.
Please note: the Debit and Credit columns in your .csv file are inverted (they are filled in by your client in the opposite columns).
You may leave Expression column empty. - Reconciliation Amount Deviation allows you to hide records with a deviation smaller than specified.
- Reconciliation Amount Deviation Percent is the same in %.
- Reconciliation Date Deviation (days) determines the maximum date deviation period in which records can still match each other. If this field has a ‘0’ value or is empty the reconciliation date deviation is not verified, all the records are shown.
- Check Reconciliation Reference will match only records with equal references.
- Truncate Reconciliation Table (Truncate From) allows to delete the records from particular date (because all the previous reconciliation records are kept automatically).
- Check all the settings you need and upload a file with the records you would like to compare:
Please note: you don’t need the first string to contain columns’ titles. The reconciliation starts from the first string.
One more thing you should remember is that only records shown on the current page are reconciled. Please choose the number of records that are shown per page according to your journal records count:
![]()
Also you can easily hide the pairs of records which have ‘zero’ saldo by clicking on them:
If the compared data is different, the Reconciliation Posting Action Templates (System->Configuration, Bookkeeping tab) allow you to create automated journal records from Group by Reference tab or other tab which you select as Reconciliation Field. Here is an example of the rule:

An example of the button in use (Bookkeeping->Accounts, select Account, Group by Reference tab) is below:

The Group by Reference tab you can switch on by selecting it on the Account Information tab (Bookkeeping->Accounts, select Account):
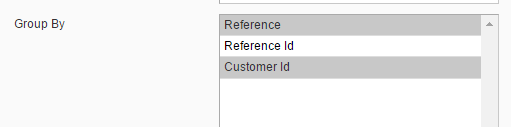
Group By option allows you to display records grouped by selected column Reference, Reference Id, Customer Id). Grouped records will be displayed on a separate tab where Saldo column contains SUM(debit – credit) of all grouped records.
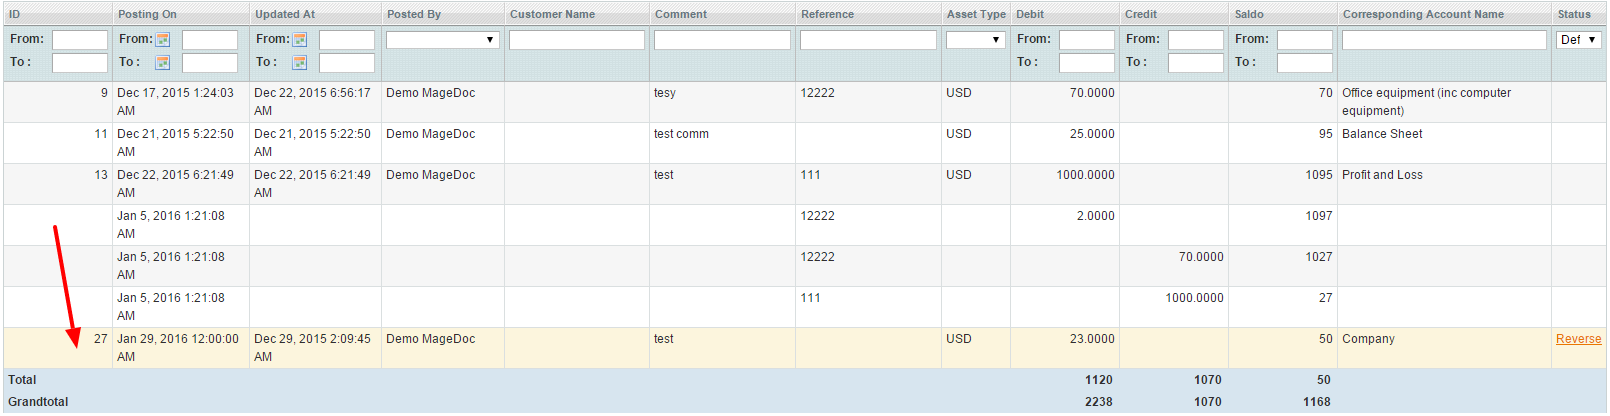
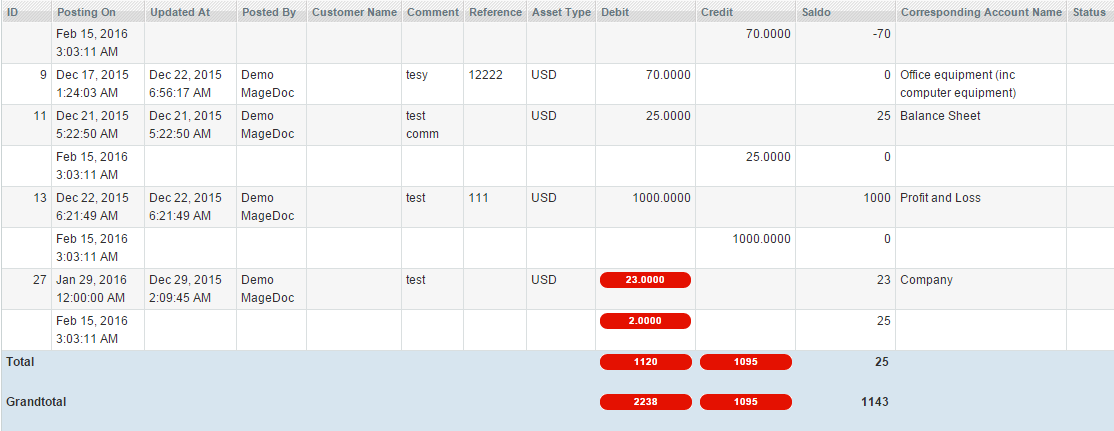
On the Reconciliation tab click the Search button, to see all the journal records connected with the compared account. The ones that don’t match are highlighted with red color:
You can easily manage the journal records per customer.
All you need to do is fill in the Automated Posting Rules and set the Customer Records Reference RegExp for Linking, in System->Configuration->Bookkeeping tab.
If you want to see all the transactions per client, please follow this path:
Customers->select Customer->open Journal tab:
Also, you can see reconciled records per customer on the ‘Reconciliation By Reference’ tab:

B2B: Records in Customer Account Section on Frontend
Your customers also can see their transactions and settlements in the front-end accounts.
Please fill in the Automated Posting Rules and set the Customer Records Reference RegExp for Linking, in System->Configuration->Bookkeeping tab to switch on this option.
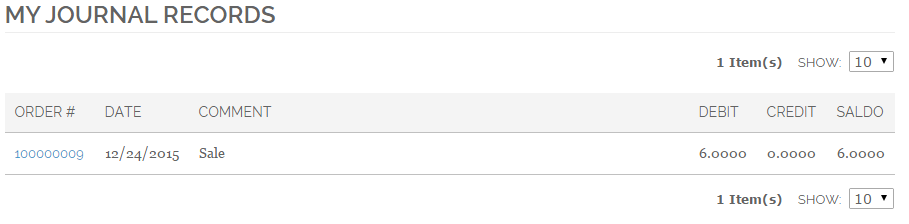
All the journal records are collected in the My Journal tab:
My Settlements tab contains the journal records that have non-zero Saldo by Reference (which links several journal records).
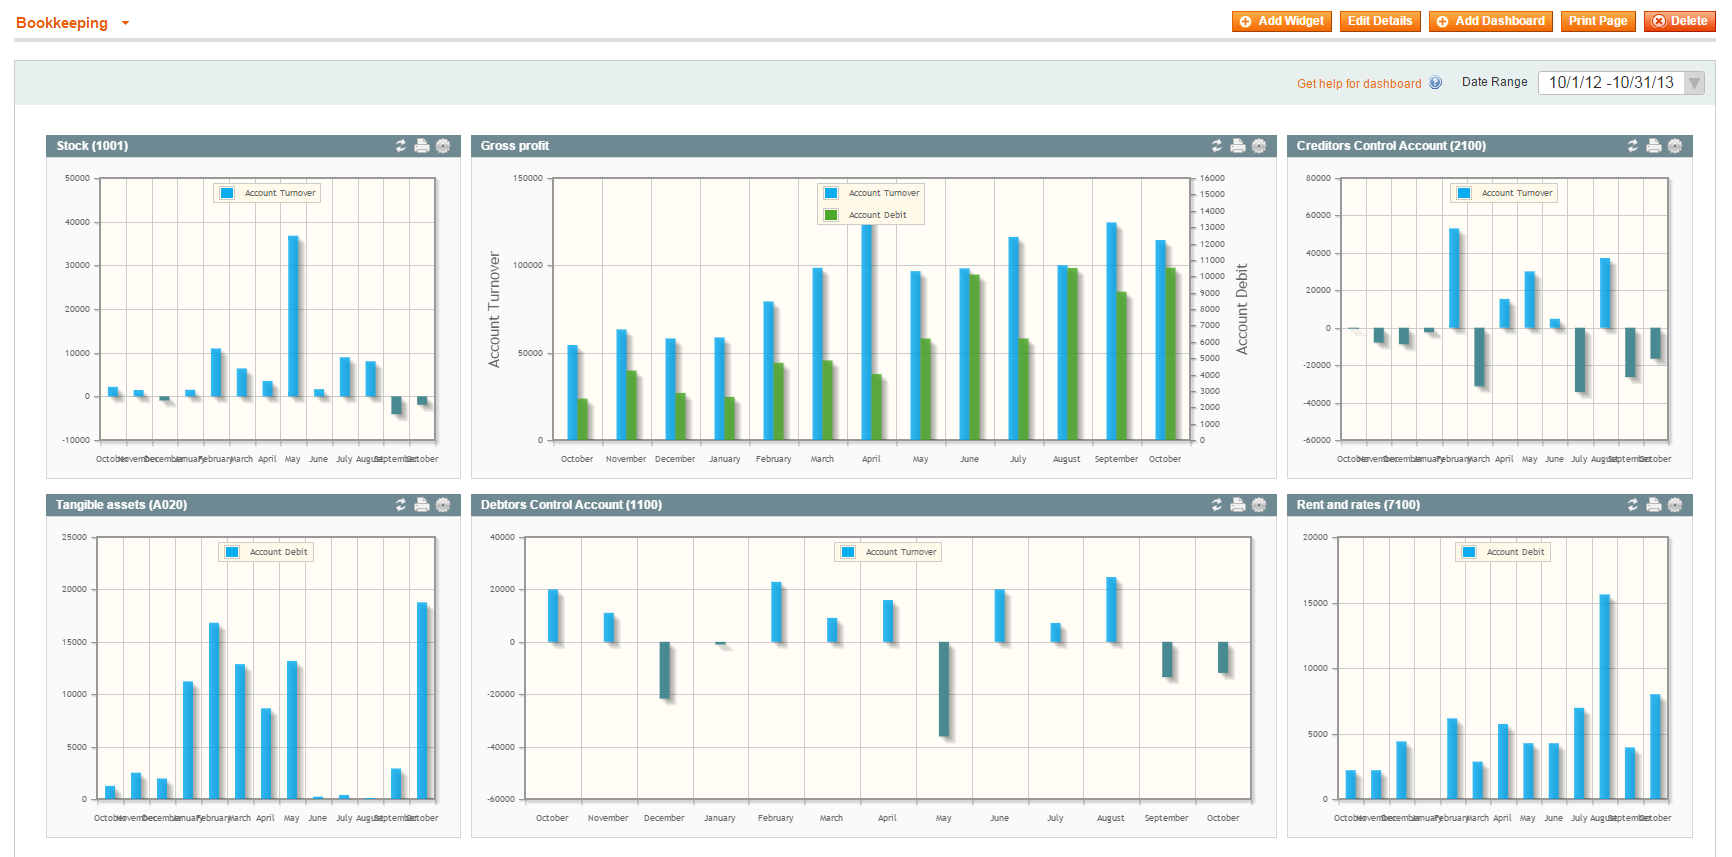
MageCore Dashboard Integration
Our module adds specific accounting metrics to the MageCore Dashboard, such as:
- Account Debit;
- Account Credit;
- Account Turnover;
- Account Saldo;
- Account Records Count.
It helps to analyse and manage a money flow guided by the convenient diagrams. The diagrams are fully customisable.
Please note: while managing Widget you can see only Accounts from present Account Chart select on Manage Accouts page, you can switch it there to see other accounts.
Pie Chart Widget makes sense only for Accounts which have Primary hierarchy type to display subaccounts as pie sectors.
Integrated Accounting module is accompanied with a mobile version of Magento admin panel.
It is user-friendly on mobile devices and tablets.
The Form Wizard feature was introduced to simplify filling forms on mobile devices. You can toggle the Form Wizard by clicking on a header of a form. Here is an example of the Asset Type form. Once Edit Asset Type page is opened by navigating through Bookkeeping -> Asset Types -> selecting any Asset Type, you will see the following on your mobile device:
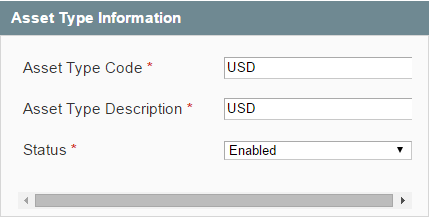
There is not enough space on a screen to display the whole form.
Click on the form header to transform the form into the Wizard view:
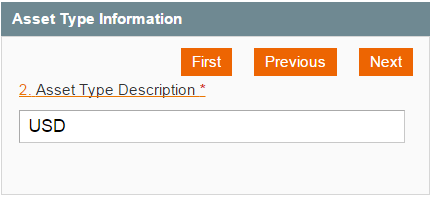
Where you can switch between the fields with ‘First’, ‘Previous’, ‘Next’ etc. buttons.
The Grid Filter Wizard works similarly to Form Wizard:
- on a desktop regular filters are displayed:
- on a mobile device filters are collapsed and wizard is toggled by the Filter button: